It's brew day again in the NEW DeArmond house. A few things have been mixed up here. First off I had to use a new brewing shop because my old one is to far away. Olympic Brewing Supplies in Bremerton has some serious advantages but it's no where near the massive size of Larry's. They have a great system for ordering specialty (or base) grains. Much like Zanatto's market used to do for sandwiches, there's a form you fill out with exactly what you want. All the grains are posted with their prices on the little form and you just hand it to them. They also pour extract for you at 1.85/lb if you bring your own container. All in all a good little shop, they know their stuff. One other small disadvantage is that they sell their hops in 2oz packs rather than 1 oz packs.
So today we're working towards a deep dark strong beer. I wanted to really bring out both the dark, sweet, and malty flavor for this stout so I went with 1lb each of my specialty grains. Chocolate, roasted barley, and Crystal 120. I'm planning to drop somewhere around 1lb of espresso beans into the secondary and really bring out a big coffee flavor.
Imperial Espresso Stout
Batch size: 5.0 gal
Boil volume: 4.0 gal
OG: 1.081
FG: 1.020
Bitterness (IBU): 60.6
Color (SRM): 54.8
ABV: 8.0%
Light LME 7lb
Light DME 3lbs
Crystal 120L 1lb
Roasted Barley 1lb
Chocolate Malt (US) 1lb
Nugget 2.00oz 11.5% AA Whole @ 60 min, 60.6 IBU
Nottingham Ale yeast
Sunday, September 25, 2011
Monday, September 12, 2011
The review of Root Beer Beer
So this is completed. I did some additional work to try to sweeten it up by adding three tablespoons of stevia. It worked to sweeten it but the flavor combination gave an interesting problem.
When you drink beer you have a very dry flavor. Even beer defined as sweet (due to crystal or honey malt) give an allusion to sweet with out actually being any more sugary than other beers. These residual flavors mix well with the dry flavor that beer presents creating a smooth malty beverage. Soft drinks, and soda in any variety, is never actually dry. The heavy sweetened liquid may be described as tangy, creamy, fruity or herbish. But never dry.
In the end these two flavors seem to be somewhat irreconcilable. A beer that is dry, shouldn't be sugary sweet. A soda shouldn't be dry. I didn't manage to get a way to combine these two issues into a palatable drink. My previous attempts at oatmeal vanilla stout came much closer to the root beer flavor than this particular drink ever could. Though it was still very dry, and not very sweet.
In summary, there's a reason that there isn't a large number of alcoholic root beers available on the market and that breweries aren't making their own mix in every town. The truth is the two flavors of beer and soda don't mix very well. I should have realized by the lack of functioning recipes was caused by the lack of ways to make this particular drink work.
In short, don't make this beer. I poured out half my bottles tonight.
Tuesday, August 9, 2011
Directions to Start a Sourdough Starter now that I've Started Mine
I just passed along my first helping of my sourdough starter to a close friend. This makes me officially something, but I'm not sure what. However, she asked for directions on what to do with her starter. So I guess I better write up something that clearly spells everything out. I guess you're stuck with reading that now too.
Either way, making your own sourdough is something that I've long been told was impractical. Because of the requirements of "having a starter", it seems something of a bygone era. I've been told its hardly worth the effort or time. Unfortunately there is a few things that make this somewhat true. Around here a good loaf of sourdough runs three to five bucks. When compared with the work of making your own, the time involved certainly doesn't quite end up in your favor. However, being able to control what goes into your bread probably is worth a little extra time. Also, everyone that's picked up a disappointing loaf of sourdough knows that fresh hot sourdough is incomparable when it comes out of the oven.
The following will be a summary of my knowledge on the subject of sourdough and its starter as well as directions for caring for your own. I'll make the note here that I've probably made about 15 loaves at this point and I've finally gotten it down to a way I actually want to eat it for the last three. That's a grand summary of 12 different ways NOT to make sourdough I now know. It's a fair bit of failure I'm preventing you from there.
Sourdough Starter
There's two ways to get sourdough starter. First off, the historic way, is to have someone with starter give you some. It's important to realize that this isn't like asking for anything of value from a neighbor. They really aren't losing anything other than half a cup of flour and warm water that the might have to throw away anyway. So if you know someone who has a starter, ask. They may even have a blog post that tells you what to do with it once you have it. The second way is to get a dry starter. These can be purchased but the ones found in organic food stores really aren't that great and they don't actually sell them in normal supermarkets. The best place to get one of these is from Carl's Friends. If you send them a self addressed and stamped envelope then they'll send you some starter in a little plastic bag.
There actually is a third way to get a sourdough starter which includes setting out some water and flour mix and letting it go sour (much like milk goes sour). Then propagating it from there. This is a manner of capturing wild yeast and much like lambic brewing it is best left to people who know what they're doing.
What is Starter?
What you've got there is yeast. Whether dry or wet, the mix is probably somewhat similar. Yeast and flour in some various quantity in a little jar or powder. You know what flour is. Yeast is a living microorgamism that eats sugar and poops alcohol and CO2. The CO2 is what is important for baking, the alcohol is what is important for brewing. Because it is alive a yeast starter needs to be fed, kept warm, and safe. You can sing to it a little too if you want.
A starter needs two things to continue to propagate. First is carbohydrates which is usually added in the form of flour. The second is water, generally warm water is best (from the hot tap in your sink). This is kept at a moderate temperature ideally between 90 and 100 degrees. The yeast will multiply and you'll have more starter than you started with, some of which is used for baking. The rest is used to make more starter.
Caring for your Starter
Where I live 90 degrees isn''t an easy thing to find occurring in nature. If we're unlucky we'll get about a week of heat above 90 degrees in summer, if we're lucky it'll only be a day or two. This means we need an artificially location that we can keep the starter. Years of knowledge have shown us that if you turn on your oven light and close the door, its temperature will range between 85 and 100 degrees. This makes your oven the perfect place for storing starter as well as raising bread. I had never understood the purpose of that little light until now.
I don't feed my starter every day, but generally every other day. I also feed it the two days before I actually make bread. I feed it equal parts flour and warm water. If I'm just keeping it along, I'll only throw in about 1/3 or 1/2 cup of each. If I'm trying to grow it big I'll do up to 1 cup of each. I generally use bread flour which I store in a gallon container as I go through a large amount of it making my own bread. If I feel that my starter doesn't have enough sour kick I'll do 1/2 cup rye flour and warm water to boost the sour flavor.
(One note on flour, apparently bread flour is different from regular flour, so use bread flour for bread. Also don't use whole wheat bread flour. You can mix a little of it in with the white flour in about a 1 to 2 ratio but full whole wheat sourdough doesn't really work well. The nutty flavor of whole wheat doesn't really mesh well with the sour flavor and you end up with something that is mediocre instead of light and fluffy.)
You can see how it is pretty easy to end up with massive amounts of starter relatively quickly. If you're adding 2 cups of total material to it each day, It'll continue to grow unless you make bread every day. Another option is to refrigerate your starter after it gets going strong. I used a baby food jar and stuck it in the fridge. When I came back a few weeks later and got it going again it still worked great. It took a few days to build up mass to a decent size but I was back to making more sourdough quickly. When it's cool the yeast goes inert and falls asleep. I've heard that if you're only making bread once a week you can keep your starter on the counter and the yeast will still work but at a much slower pace requiring less often feeding. I haven't done this yet but it seems it could be a good way to moderate the amount of starter you end up with.
Making Bread
The actual process of making bread is full of imperfection, lack of clarity, and issues. I haven't figured out how to make loaves rise up rather than out when they're not in a bread pan so I haven't made effective sourdough bread bowls yet. So this is what I'm doing right now that makes good, basic, bread shaped bread for everyday use.
In the mixer with a dough hook mix for (10-15 minutes):
3 cups white bread flour
2 tsp sugar
2 tsp salt
1 cup sourdough starter
1 cup warm water
1 tsp (1/2 packet) dry yeast (not instant)
Sometimes this comes out perfect, sometimes it needs more water, sometimes it needs more flour. Using my Kitchenaid mixer you want the dough to mostly attach to the hook but still be sticking to the very bottom of the bowl at the same time.
Then spray a large glass bowl with cooking spray and put the dough into the bowl. You may find it easier to detach the hook, flour your hands, and spray them with cooking spray. This stuff should be super sticky at this point. It will stick to anything. Spray the top of the dough with cooking spray and cover with plastic wrap.
There's no reason you can't just use flour instead of cooking spray if you want to be more traditional.
Let it rise in the oven for about one and a half hours. It should be much bigger at this point.
Take the dough out and knead on a floured surface for 5 minutes.
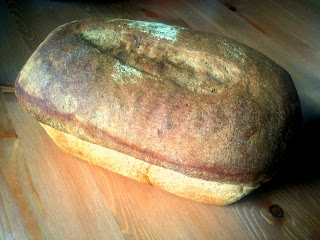
Spray your bread pan with cooking spray and place the dough in it. This is the time to place cuts into the top of the bread to suit your design preferences. Then spray the top of the bread and cover with the same piece of plastic wrap you used for the bowl. Stick back in the oven for one to two hours. How long you let it sit depends on how fluffy you want your. The longer time it sits, the more CO2 is released by the yeast making bigger bubbles in the bread. One hour will make a fairly dense and hefty bread while three hours might escape your pan and be very light and fluffy when cooked. I'd advise somewhere between one and a half and two hours.
When it reaches the size you want it (it won't really rise much when cooked) take it out and turn on the oven to 425. Take the plastic wrap off and cook for 20 minutes, then turn down to 400 for 20 minutes. Then take it out of the oven and remove from bread pan to cooling rack. It is ready to eat and should be tasty.
Yesterday's looked like this:
A few important side notes.
1) Don't put a tightened lid on your starter in the oven. That release of CO2 is making carbonation which equals pressure. It could cause your jar to explode if you're unlucky, or spray all over the place if you're lucky.
2) Take out your yeast starter before you turn the oven on for cooking anything. This includes bread or a roast, or anything that you turn on the oven for. I've melted plastic lids into my starter which ruins the starter, and the lid.
3) Spray or flour the top of the dough, no really. When you look at your nicely proofed batch of sourdough that has achieved a glorious shape you're finally proud of it is very sad to pull off the plastic wrap and find that the top 1/4 inch of dough comes with it.
4) After you make a batch, refeed your starter. Don't empty it all the way to make a batch of bread. You want it to keep growing.
5) Don't worry about the hooch, just don't drink it. Hooch is the layer of alcohol that forms on top of your starter as a byproduct of yeast reproduction. Don't throw it out for sourdough. It contains a fair amount of the sour flavor. Just stir it back in. Also, don't be a hoochy mama and drink it to get drunk. There are thousands of way to become intoxicated, this one is probably the worst.
6) Take your bread out of the bread pan when it's done. If you leave it in there it'll get damp and won't last as long. Let it cool on a rack.
Either way, making your own sourdough is something that I've long been told was impractical. Because of the requirements of "having a starter", it seems something of a bygone era. I've been told its hardly worth the effort or time. Unfortunately there is a few things that make this somewhat true. Around here a good loaf of sourdough runs three to five bucks. When compared with the work of making your own, the time involved certainly doesn't quite end up in your favor. However, being able to control what goes into your bread probably is worth a little extra time. Also, everyone that's picked up a disappointing loaf of sourdough knows that fresh hot sourdough is incomparable when it comes out of the oven.
The following will be a summary of my knowledge on the subject of sourdough and its starter as well as directions for caring for your own. I'll make the note here that I've probably made about 15 loaves at this point and I've finally gotten it down to a way I actually want to eat it for the last three. That's a grand summary of 12 different ways NOT to make sourdough I now know. It's a fair bit of failure I'm preventing you from there.
Sourdough Starter
There's two ways to get sourdough starter. First off, the historic way, is to have someone with starter give you some. It's important to realize that this isn't like asking for anything of value from a neighbor. They really aren't losing anything other than half a cup of flour and warm water that the might have to throw away anyway. So if you know someone who has a starter, ask. They may even have a blog post that tells you what to do with it once you have it. The second way is to get a dry starter. These can be purchased but the ones found in organic food stores really aren't that great and they don't actually sell them in normal supermarkets. The best place to get one of these is from Carl's Friends. If you send them a self addressed and stamped envelope then they'll send you some starter in a little plastic bag.
There actually is a third way to get a sourdough starter which includes setting out some water and flour mix and letting it go sour (much like milk goes sour). Then propagating it from there. This is a manner of capturing wild yeast and much like lambic brewing it is best left to people who know what they're doing.
What is Starter?
What you've got there is yeast. Whether dry or wet, the mix is probably somewhat similar. Yeast and flour in some various quantity in a little jar or powder. You know what flour is. Yeast is a living microorgamism that eats sugar and poops alcohol and CO2. The CO2 is what is important for baking, the alcohol is what is important for brewing. Because it is alive a yeast starter needs to be fed, kept warm, and safe. You can sing to it a little too if you want.
A starter needs two things to continue to propagate. First is carbohydrates which is usually added in the form of flour. The second is water, generally warm water is best (from the hot tap in your sink). This is kept at a moderate temperature ideally between 90 and 100 degrees. The yeast will multiply and you'll have more starter than you started with, some of which is used for baking. The rest is used to make more starter.
Caring for your Starter
Where I live 90 degrees isn''t an easy thing to find occurring in nature. If we're unlucky we'll get about a week of heat above 90 degrees in summer, if we're lucky it'll only be a day or two. This means we need an artificially location that we can keep the starter. Years of knowledge have shown us that if you turn on your oven light and close the door, its temperature will range between 85 and 100 degrees. This makes your oven the perfect place for storing starter as well as raising bread. I had never understood the purpose of that little light until now.
I don't feed my starter every day, but generally every other day. I also feed it the two days before I actually make bread. I feed it equal parts flour and warm water. If I'm just keeping it along, I'll only throw in about 1/3 or 1/2 cup of each. If I'm trying to grow it big I'll do up to 1 cup of each. I generally use bread flour which I store in a gallon container as I go through a large amount of it making my own bread. If I feel that my starter doesn't have enough sour kick I'll do 1/2 cup rye flour and warm water to boost the sour flavor.
(One note on flour, apparently bread flour is different from regular flour, so use bread flour for bread. Also don't use whole wheat bread flour. You can mix a little of it in with the white flour in about a 1 to 2 ratio but full whole wheat sourdough doesn't really work well. The nutty flavor of whole wheat doesn't really mesh well with the sour flavor and you end up with something that is mediocre instead of light and fluffy.)
You can see how it is pretty easy to end up with massive amounts of starter relatively quickly. If you're adding 2 cups of total material to it each day, It'll continue to grow unless you make bread every day. Another option is to refrigerate your starter after it gets going strong. I used a baby food jar and stuck it in the fridge. When I came back a few weeks later and got it going again it still worked great. It took a few days to build up mass to a decent size but I was back to making more sourdough quickly. When it's cool the yeast goes inert and falls asleep. I've heard that if you're only making bread once a week you can keep your starter on the counter and the yeast will still work but at a much slower pace requiring less often feeding. I haven't done this yet but it seems it could be a good way to moderate the amount of starter you end up with.
Making Bread
The actual process of making bread is full of imperfection, lack of clarity, and issues. I haven't figured out how to make loaves rise up rather than out when they're not in a bread pan so I haven't made effective sourdough bread bowls yet. So this is what I'm doing right now that makes good, basic, bread shaped bread for everyday use.
In the mixer with a dough hook mix for (10-15 minutes):
3 cups white bread flour
2 tsp sugar
2 tsp salt
1 cup sourdough starter
1 cup warm water
1 tsp (1/2 packet) dry yeast (not instant)
Sometimes this comes out perfect, sometimes it needs more water, sometimes it needs more flour. Using my Kitchenaid mixer you want the dough to mostly attach to the hook but still be sticking to the very bottom of the bowl at the same time.
Then spray a large glass bowl with cooking spray and put the dough into the bowl. You may find it easier to detach the hook, flour your hands, and spray them with cooking spray. This stuff should be super sticky at this point. It will stick to anything. Spray the top of the dough with cooking spray and cover with plastic wrap.
There's no reason you can't just use flour instead of cooking spray if you want to be more traditional.
Let it rise in the oven for about one and a half hours. It should be much bigger at this point.
Take the dough out and knead on a floured surface for 5 minutes.
Spray your bread pan with cooking spray and place the dough in it. This is the time to place cuts into the top of the bread to suit your design preferences. Then spray the top of the bread and cover with the same piece of plastic wrap you used for the bowl. Stick back in the oven for one to two hours. How long you let it sit depends on how fluffy you want your. The longer time it sits, the more CO2 is released by the yeast making bigger bubbles in the bread. One hour will make a fairly dense and hefty bread while three hours might escape your pan and be very light and fluffy when cooked. I'd advise somewhere between one and a half and two hours.
When it reaches the size you want it (it won't really rise much when cooked) take it out and turn on the oven to 425. Take the plastic wrap off and cook for 20 minutes, then turn down to 400 for 20 minutes. Then take it out of the oven and remove from bread pan to cooling rack. It is ready to eat and should be tasty.
Yesterday's looked like this:

A few important side notes.
1) Don't put a tightened lid on your starter in the oven. That release of CO2 is making carbonation which equals pressure. It could cause your jar to explode if you're unlucky, or spray all over the place if you're lucky.
2) Take out your yeast starter before you turn the oven on for cooking anything. This includes bread or a roast, or anything that you turn on the oven for. I've melted plastic lids into my starter which ruins the starter, and the lid.
3) Spray or flour the top of the dough, no really. When you look at your nicely proofed batch of sourdough that has achieved a glorious shape you're finally proud of it is very sad to pull off the plastic wrap and find that the top 1/4 inch of dough comes with it.
4) After you make a batch, refeed your starter. Don't empty it all the way to make a batch of bread. You want it to keep growing.
5) Don't worry about the hooch, just don't drink it. Hooch is the layer of alcohol that forms on top of your starter as a byproduct of yeast reproduction. Don't throw it out for sourdough. It contains a fair amount of the sour flavor. Just stir it back in. Also, don't be a hoochy mama and drink it to get drunk. There are thousands of way to become intoxicated, this one is probably the worst.
6) Take your bread out of the bread pan when it's done. If you leave it in there it'll get damp and won't last as long. Let it cool on a rack.
Tuesday, August 2, 2011
Barleywine Reviews
In the interest of making our own batch of barleywine a church friend and I decided that a tasting was necessary to convince his wife of the plan. So we traveled to the local quality beer shop 99 Bottles in Federal Way. For anyone that hasn't had the experience of exploring this shop, it's really an amazing place. Beers from all around the world as well as numerous microbrews across the US. They had over 20 different kinds of barleywine, however, being that barleywine is in season during the winter, there was a limited number of available 12 oz bottles. So we picked up a few different kinds, some more barleywine than others.
For those who don't really understand what is meant by barleywine let me take you on a brief tour. Barleywine is generally above 10% alcohol making it a very serious drink. It's got a very rich and malty flavor that brings in a toasted grain and dried fruit sort of flavor. Depending on the variety of barleywine (English or American) the hop flavor can range from mild to assertive but either way the malt flavor should shine through. It's also fairly expensive. I payed $5 for a 7 oz bottle and the same for an 8.5 oz bottle. This is somewhat acceptable as it is a special occasion drink, more to be treated like a dessert wine than an BBQing beer.
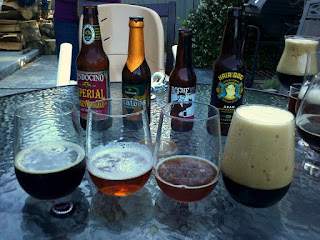
We picked up 4 for our taste test that actually ranged a cut wide swath through the field of heavy beers. We had Scaldis Belgian Ale, Rogue Brewery's Old Crustacean Barleywine, Hair of the Dog's Adam, and Mendocino Imperial Barleywine. None of these particular brews fell below the 11% line so we knew we were in for an interesting night.

From left to right: Imperial Barley Wine, Belgian Ale, Old Crustacean, Adam.
Mendocino Barleywine Ale
Appearance - 4.5 : Deep and dark red with a dark tan foam forming a perfect head. Crystal clear. Color makes me think of a really rich Irish Red.
Smell - 4.0 : Smell points to the definite sweetness of the beer. Very malty with no clear sign of hops. Brings preparation for a very strong brew with toasted toffee and caramel in the mind.
Taste - 4.5 : Very rich and sweet. For those hoping for a dryer beer flavor stay away. Initial flavor contains no hop bitterness, very smooth. Brings to mind a vast array of dried fruit flavors, plum, prune, date, fig, and cherry all come to mind. Sweetness points towards a sherry or port flavor. Slight earthy hop flavor at the finish. Very sweet throughout without any noticeable alcohol hotness.
Feel - 4.0 : Thick and chewy without being overwhelming. Very smooth throughout in spite of it's high gravity.
Overall - 4.5 : This is definitely the best barleywine we tasted tonight. Very fitting to expectations. As a port lover, the sweetness it brought with it was very welcome though I can see how others would be less fond of such a sugary beer. My only big confusion here is what Imperial is doing in the name. There wasn't really anything I found Imperial about it.
Scaldis Belgian Ale
As a note this really isn't a barleywine. It's considered a Belgian quadruple ale which basically means a really strong, but regular beer. I figured it'd round out the tasting to see if we'd be interested in a really high gravity but lighter beer.
Appearance - 4.0 : Poured nicely with a decent white head. Light color matching of the Belgian style.
Smell - 3.5: Not very pronounced, slight aroma of something orangish but otherwise could have been any beer we were smelling. No identifiable hop or malty smells.
Taste - 2.0 : Flavor is dominated by a hot alcohol burn but otherwise matching a dry Belgian. Other flavors are brutally swept aside by alcohol flavor. Somewhere near the end the light orange flavor shows back up but you're too busy grimacing to notice it. Could have had a shot or two of vodka accidentally dumped into the bottle.
Feel - 2.0 : Burning followed by more burning. Density is light for of a high gravity beer but considering the light color it makes some sense.
Overall - 2.5 : The only positive thing I'll say about this beer is that it's flavor held up when paired with our dessert. Compared to all the others we tasted this night this is the only one that followed a strawberry and still maintained its profile. It also served as a palate cleanser between other beers bringing out a number of flavors we had missed on first taste. However, the same could probably have been achieved by getting a regular Belgian and dumping two shots of cheap vodka in the glass. It'd probably taste about the same and not run you $5 for 8.5 oz.
Rogue Brewery Old Crustacean
First off I'd like to point out that this brew is frequently considered to need significant aging before being ready to drink. We did not do this. We had a 7 oz bottle of 2011 which we cracked open and drank So that's what I'll review here. I'm sure some people are crying out against the crimes we committed against the beer. But all of these brews were off the shelf.
Appearance - 3.0 : The big lack here was under carbonation. Little to no head, nice light amber color. I felt that it poured a bit thin for a barleywine.
Smell - 3.5 : Dominated by a strong American hops smell. I had difficulty tracing down much of any malt aroma through the hops. This promised to pack a punch with all those hops. Right up front. However, smelt more like an IPA to me.
Taste - 3.5 : Big upfront bitterness that ended with a citrus and floral hop finish. Malt flavor absent. No noticeable alcohol burn. Mild dryness overall. This seemed to me to mirror a double IPA and definitely lacked the malt flavor I was seeking in a barleywine. As a double IPA would have been fine.
Feel - 4.0 : Smooth with decent thickness. What I didn't see in the pour I felt when drinking.
Overall - 3.5 : My primary disappointment here comes down to expectations and prince. While not a bad beer it really didn't measure up to my expectations of a barleywine. I really feel that I over payed for this beer. At $5 for a 7oz bottle I'd expect flavors I couldn't find in a six-pack of Torpedo IPA. Save some money and just get a double IPA instead.
Hair of the Dog "Adam"
Billed as an Old Ale, not a barleywine but in the end that doesn't make much difference to me. Hair of the Dog also makes an American Barleywine but we figured this would be closer to a British style so it's what we ended up with.
Appearance - 2.0 : Massive, overgrown, and inappropriate head on this beer. Level of foam made me think of a root beer float with the root beer poured over the ice cream. Couldn't actually split the bottle into two glasses without waiting for the head to die down. Otherwise dark color just on the bottom range of black. Foam had a dark tan color and it poured thick and smooth.
Smell - 4.0 : Rich malt aroma tending to the dark malts but not limited there. Some sweet malt smell present but minor. Hops aroma absent.
Taste - 4.0: Easy and smooth start with slight sweetness before drifting towards the bitterness of roasted barley or chocolate, a slight hotness, and finishing with light woody hops. Good complex mix of flavors. The alcohol flavor is present but pleasant mixed in with other malts. Calls to chocolate, figs, and leather, all lightly smoked.
Feel - 4.5 : Thick and well carbonated heading towards syrup but still smooth. Carbonation lasted for a long long time, not surprising considering the initial head.
Overall - 4.0 : A very fine brew. I'm confused as to the initial size of the head but other than that everything went well. One note I'd make is that this falls short of the richness of an imperial stout by dancing among other flavors. It's a light smoky bitterness, light sweetness, light hop flavor, and light alcohol hotness all rolled into one. With so many flavors I find myself wishing to explore one direction or another a little more but it's nice to find them all in balance.
Final Thoughts
The Mendocino Imperial Barleywine ale clearly won out here. Especially considering its price was almost half of all the others. This led us to want to make a barleywine with heavy inclusion of Crystal 120 and Special B, slight hop bitterness but perhaps a little more earthy hop finish. The Hair of the Dog "Adam" was definitely a good drink but all the dark malts covered up some of the sweetness I was looking for but weren't bold enough to be the focus of the beer. I'd be willing to try a couple year old Old Crustacean if someone pulled one out, but I wouldn't pay to drink it again. I'd personally avoid the Scaldis and settle for a Belgian Double that could be more complex without being so bold.
Wednesday, July 27, 2011
Is there such a thing as a wheat bush?
This one goes out to all my Manitou Park Elementary friends who introduced me to the wonderful world that is wheatberries. Take that pasta salad!
According to wikipedia, "wheatberry or wheat berry refers to the entire wheat kernel (except for the hull), comprising the bran, germ, and endosperm. Wheatberries have a tan to reddish brown color and are available as either a hard or soft processed grain." They come dried heavily resembling barley and would probably fulfill a similar role in soups by adding some density and carbs in little pockets. However, it is also very useful as a substitute for small pasta like orzo. Being that it consists of a whole grain rather than just the high carb flour used for pasta it provides a far more healthy alternative as well.

According to wikipedia, "wheatberry or wheat berry refers to the entire wheat kernel (except for the hull), comprising the bran, germ, and endosperm. Wheatberries have a tan to reddish brown color and are available as either a hard or soft processed grain." They come dried heavily resembling barley and would probably fulfill a similar role in soups by adding some density and carbs in little pockets. However, it is also very useful as a substitute for small pasta like orzo. Being that it consists of a whole grain rather than just the high carb flour used for pasta it provides a far more healthy alternative as well.
Cooking with these little berries requires a fair amount of preparation as they need to be soaked overnight before use. I've seen some recipes that call for only soaking for an hour or so. I'm not sure how they'd turn out. But filling a pot with water the day before you want to cook at batch and pouring them in really isn't too hard. Once they've been soaked all you have to do is rinse them off then boil them for an hour or so and rinse again.
Here comes the big secret through. According to my elementary teacher contacts you can freeze them in premeasured bags at this point with no ill effects. This means that you can soak and cook a big batch all at once and then freeze them in ziplock bags for later use. All that work only needs to be done once.
Once they're done they can be used to make a pasta salad, side dish, thrown into soups, or whatever else you desire. The best thing about them is that they really don't require heavy seasoning like pasta. The gummyness of pasta usually requires you to add oil to keep it from sticking together and some fairly heavy seasonings and salt to make taste good. The wheatberries already have their own rich, buttery flavor meaning they don't require anything additional.
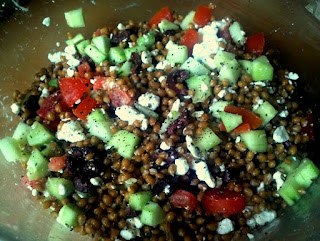
Wheatberry Greek Salad
1 cup (unprepared) wheatberries (3-4 cups prepared)
1/2 cucumber (peeled)
1 small tomato
20 pitted Katamala olives
2 oz crumbled feta cheese
1/4 tsp salt
Black pepper
Prepare wheatberries by soaking over night, rinsing, boiling for 1 hour, then rinsing again with cold water and draining.
Dice 1/2 cucumber with seeds removed, set aside in a bowl and cover with the salt. Let sit for 5 minutes.
Dice Tomatoe and Katamala olives.
Stir together diced wheatberries, diced cucumber, diced tomato, diced olives, and feta together. Crack fresh pepper over the mix.

Again one important thing to notice is the lack of heavy seasoning or oil to make a great pasta salad. Just veggie elements. The salt is optional and I only use it because I ended up with a pretty bitter cucumber. If yours are good and fresh you won't need it. There's tons of other stuff you could add to the salad, from broccoli, roast veggies, onion, peppers, to sausage, ham, chicken, or bacon.
Saturday, July 23, 2011
A New Look at Carrots
Recently we've been looking at carrots. In particular because we saw some seeds for amazing purple carrots. They were a deep beet purple on the outside but were a pretty normal orange on the inside. Apparently wild carrots are purple and they all used to look like that until they were bred to be orange. Personally, I'm liking what the purple does to my salad.
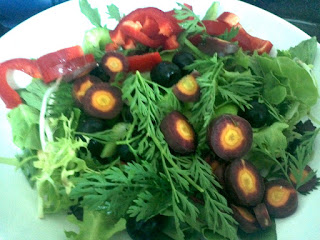
Now the other thing that I threw into my salad here is the carrot greens. They have a light carrot/parsley flavor and only when you get down to the big thick stems do you tend to find heavy off flavors. They were really good in my salad and brought in a bold flavor to the greens. This made me start to think, how can you use carrot greens productively. You get about double the leafy green compared with the meat of the carrot. It's a bummer to just throw them away.
(On a side note there is some question as to the poisonous nature of carrot greens. It is a very powerful allergen to those allergic to yarrow and chamomile. Considering that I'm fond of chamomile tea, I'm probably safe. For more info check the Carrot Museum. Then explain to me who decided to set up a museum of carrots.)
One big use discussed is in broth or stock. I can imagine that these greens bring great flavor to soups or stocks because the combination of carrot/parsley flavor could really boost an otherwise bland chicken or veggie stock. It's also an easy use as they just get tossed into a pot and boiled. But for me, today, this isn't a crazy enough idea. I need to go bigger. Therefore, I give you sauteed carrot tops with garlic and fennel.
Sauteed Carrot Tops with Garlic and Fennel (serves 4)
1 tbsp olive oil
3 cloves of garlic sliced thin or pressed
1 tsp fennel seeds
Carrot tops from one bunch of carrots (tear off the leaves from the stem and cut into 3-5 inch pieces)
Salt and Pepper
1 pinch red pepper flakes
2 tsp wine vinegar
2 tbsp water
1 tbsp butter
Tear off leaves from the stems of the carrots and rinse well. The stems have a very strong flavor making them fantastic for stock but overpowering when eating straight. Keep the carrots for later use or throw them in with the leaves and cook them all together.
Heat olive oil in a frying pan that you have a lid for over medium low heat (consider the amount of leaves and the amount of space in the pan).
Once it heats up press in the garlic and toss in the fennel.
Stir for about 3 minutes until the garlic begins to brown lightly.
Dump carrot tops into the pan and stir to coat them with the oil and to get the garlic off the bottom of the pan. Sprinkle with salt, pepper and pepper flakes and stir every 30 seconds for 2-3 minutes.
Pour wine vinegar onto the mixture along with a couple of tablespoons of water. Stir again and cover for 5 minutes. After 5 minutes stir again and cover.
Take off lid and turn off heat. Then throw your tab of butter on top and stir it in.
Mine ended up like this when served with steak and potato:
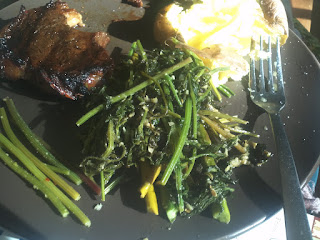

The stems are to the left, they were too potent to eat.
Friday, July 15, 2011
Homemade Root Beer Beer
A while ago my brother challenged me, without him knowing it, to make a Root Beer Beer (aka Hard Root Beer). He simply said he wished he could find it. Considering its not generally available I can only imagine that it's actually rather difficult to make. BYO (Brew Your Own Magazine) has a recipe that they ran a while ago for a Root Beer Stout. However, their recipe seems more of a root beer flavored stout rather than the rich, creamy, sweet flavor of a real root beer. So I here I stand having brewed a root beer beer. I have little to no idea how this will turn out. But it's a good experiment.
My recipe conglomeration consisted of spices I knew I could find at our local organic food shop. Some of these may prove difficult to find ay brew shops but if you have a good, old-fashioned medicinal herb counter at a nearby organic food store you're in luck. They'll probably have everything you need. I ended up with sassafras root, sarsaparilla, star anise, and spearmint (no wintergreen was to be found). I also chopped a decent chunk of ginger from my fridge and used that as well.
Modeling the beer was probably a bit more difficult because I wanted to keep it somewhat light in color in, order to avoid becoming a heavy stout, as well as keeping it rich in caramely flavor. I also wanted to add a hint of depth found in darker malts without giving over to them. I ended up choosing caramel 40, honey malt, chocolate, and roasted barley. But just a hint of the last two. I also threw in an ounce of Tettanager hops because, after all, this is beer. I took an interesting risk and threw in a whole pound of lactose (milk sugar) as it is going to retain sweetness after fermentation. If I find it still doesn't have enough sweet flavor I can add some Stevia later on in the process.
Ingredients:
Everything boiled along well and as each spice went in I was concerned that it might be too much of that particular flavor. Then as time passed, everything mellowed out appropriately. The yeast is doing it's duty right now and we'll have to give it week to see if it comes up tasty. For now I'm 10 days from my batch of Red Red Wheat being ready to drink. Patience, as always, patience is required.
My recipe conglomeration consisted of spices I knew I could find at our local organic food shop. Some of these may prove difficult to find ay brew shops but if you have a good, old-fashioned medicinal herb counter at a nearby organic food store you're in luck. They'll probably have everything you need. I ended up with sassafras root, sarsaparilla, star anise, and spearmint (no wintergreen was to be found). I also chopped a decent chunk of ginger from my fridge and used that as well.
Modeling the beer was probably a bit more difficult because I wanted to keep it somewhat light in color in, order to avoid becoming a heavy stout, as well as keeping it rich in caramely flavor. I also wanted to add a hint of depth found in darker malts without giving over to them. I ended up choosing caramel 40, honey malt, chocolate, and roasted barley. But just a hint of the last two. I also threw in an ounce of Tettanager hops because, after all, this is beer. I took an interesting risk and threw in a whole pound of lactose (milk sugar) as it is going to retain sweetness after fermentation. If I find it still doesn't have enough sweet flavor I can add some Stevia later on in the process.
Ingredients:
| Amount | Item | |||||||||
|---|---|---|---|---|---|---|---|---|---|---|
| 7.00 lb | Pilsner Liquid Extract (3.5 SRM) | |||||||||
| 1.00 lb | Caramel/Crystal Malt - 40L (40.0 SRM) | |||||||||
| 1.00 lb | Honey Malt (25.0 SRM) | |||||||||
| 0.20 lb | Chocolate Malt (350.0 SRM) | |||||||||
| 0.20 lb | Roasted Barley (300.0 SRM) | |||||||||
| 1.00 oz | Tettnang [4.50 %] (60 min) | |||||||||
| 1.00 oz | Anise, Star (Boil 30.0 min) | |||||||||
| 1.00 oz | Ginger Root (Boil 15.0 min) | |||||||||
| 1.00 oz | Sasparilla (Boil 30.0 min) | |||||||||
| 1.00 oz | Sassafras Root Bark (Boil 60.0 min) | |||||||||
| 1.00 oz | Spearmint (Boil 7.0 min) | |||||||||
| 3.00 tsp | Irish Moss (Boil 20.0 min) | |||||||||
| 3.00 beans | Vanilla Bean (Secondary 2.0 weeks) | |||||||||
| 1.00 lb | Milk Sugar (Lactose) (0.0 SRM) | |||||||||
| 1 Pkgs | Nottingham (Danstar #-) |
Everything boiled along well and as each spice went in I was concerned that it might be too much of that particular flavor. Then as time passed, everything mellowed out appropriately. The yeast is doing it's duty right now and we'll have to give it week to see if it comes up tasty. For now I'm 10 days from my batch of Red Red Wheat being ready to drink. Patience, as always, patience is required.
Monday, July 11, 2011
Three great meals, part 3
The final piece of this project was actually go be enjoyed with a couple of friends that came over with their kid. It also, however, meant that I didn't have enough meat for everyone and I had to augment with some tri-tip. I suppose it would make a good comparison. I can generally buy tri-tip at $2.79 per pound at the cash and carry down the street. The only problem is that I need to get 16+ pounds at a time. It's 5 big tri-tips. My family can really only eat half a tri-tip if we're serious about it.
But either way the tacos consisted of corn tortillas, salsa, cheese, avocado, and romaine lettuce. Good salsa is essential for such things. My store purchase choice would be Emerald Valley in your favored level of heat. But I have some small shop salsa from Manuel's in Aptos, ca. (Wow. They've got a nice webpage. Never had to look it up because we've had the menu memorized for the past 22 years.) Besides going through about a pint of salsa when we're there as a family they sell it for $5 a jar. It sound like a lot for salsa but it's pretty hot salsa and a jar will last you for a bit, even with 4 people digging into it.
My tacos came out pretty good. These only have the Bottom Round:
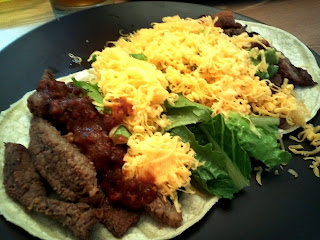

Also enjoyed with it was some homemade Cascade Pale Ale. Good stuff.
Comparatively the tri-tip was still more tender but significantly less flavorful. The ability to get on all sides of the thin strips of meat helped the marinade penetrate the meat of the bottom round. This cheap meat had a good smoky salsa flavor and was easy to bite through without dragging half your taco out of the shell on each bit. Overall great success.
As I'm reading about how butchers use meat I see a disproportionate amount of highly usable meat like this being ground up with large quantities of fat to make ground beef. However, this meat is highly usable in its low fat and natural cut. Don't fear the cheap meat. It can all be used well.
Saturday, July 9, 2011
Three great meals, part 2
Kebabs
Now I love a good piece of meat. But that's really not what I'm starting with here. It's bad tough meat. BBQing it in big chunks is the ultimate challenge for it. Short of grilling it as an actual steak, which I know won't work very well. And shish kebabs are generally better with decent sized chunks of meat rather than little tiny squares that get all over cooked.
Additionally we brought these kebabs over to a friend's BBQ so controls over the cooking was somewhat limited. It would be a true test of how well the meat would break down.
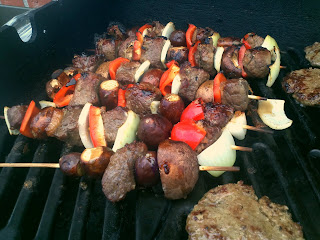
When I went to make them I found my standby jars of pineapple chunks missing. Unfortunately I forgot to stock them. Fresh pineapple would have been even better but those tend to range from really expensive to just plain silly around here. And I wasn't going with the canned beats route on this particular batch. But in generally some grilled canned beats on the skewers are fantastic. I ended up with mushrooms, onion, red bell pepper and Indian eggplant. These ranged in size from quail to robin egg size as I had used the larger ones in the stir fry last night. In the end things looked like this:
Now I love a good piece of meat. But that's really not what I'm starting with here. It's bad tough meat. BBQing it in big chunks is the ultimate challenge for it. Short of grilling it as an actual steak, which I know won't work very well. And shish kebabs are generally better with decent sized chunks of meat rather than little tiny squares that get all over cooked.
Additionally we brought these kebabs over to a friend's BBQ so controls over the cooking was somewhat limited. It would be a true test of how well the meat would break down.
When I went to make them I found my standby jars of pineapple chunks missing. Unfortunately I forgot to stock them. Fresh pineapple would have been even better but those tend to range from really expensive to just plain silly around here. And I wasn't going with the canned beats route on this particular batch. But in generally some grilled canned beats on the skewers are fantastic. I ended up with mushrooms, onion, red bell pepper and Indian eggplant. These ranged in size from quail to robin egg size as I had used the larger ones in the stir fry last night. In the end things looked like this:

Please ignore the burgers, they weren't mine. I don't do that.
The verdict on the meat was that most pieces of were very good. I ran into two pieces that were somewhat difficult to tear apart with my teeth. It was full of flavor and for the most part well tenderized. We ended up having to eat it without a knife so the pieces I struggled with would have been much better if they could have been cut in half. The eggplant turned out great, the small size meant that moisture was kept inside and each one was full of fresh eggplant flavor. I think these could have used to be marinated as well and I plan to try that in the future. But even as they were they turned out fantastic.
Friday, July 8, 2011
Let me take a moment to espouse the virtues of TAGRO
For those of you who don't know what TAGRO is you can look up more information HERE, or you can continue reading.
TAGRO is a gardening soil made from biosolids and other waste by the city of Tacoma. It's essentially effective composting of garbage and sewage made into highly effective soil that is low in bad stuff and high in good stuff. While all of this is fairly cool, what really makes TAGRO remarkable is that all you have to do is drive to their site near the Port of Tacoma and shovel it into your car - for free.
Now I'd advise you have some form of potting container if you're putting it into your station wagon or minivan. I saw a few people there with ice bins, rubbermaid containers, even a cat carrier, filling them up with free dirt. A box, trashcan, or what ever you can fit into the back of your car that can hold some good soil. There's already shovels at the site and it wasn't crowded at all.
A friend of mine from church used a pickup and covered his new front yard which has grown some really nice smooth grass. He used a pickup to haul it out of there. Now if you're really going crazy they do sell the stuff if you want them to dump it into your truck rather than shoveling. But really, if you're doing your own garden, grab a darn shovel and call it good.
We now have potted (because our back yard is sod on top of rocks) peppers, tomatoes, and lilies. Why lilies I'm not sure. I mean, you can't eat them.
Subscribe to:
Posts (Atom)