I just passed along my first helping of my sourdough starter to a close friend. This makes me officially something, but I'm not sure what. However, she asked for directions on what to do with her starter. So I guess I better write up something that clearly spells everything out. I guess you're stuck with reading that now too.
Either way, making your own sourdough is something that I've long been told was impractical. Because of the requirements of "having a starter", it seems something of a bygone era. I've been told its hardly worth the effort or time. Unfortunately there is a few things that make this somewhat true. Around here a good loaf of sourdough runs three to five bucks. When compared with the work of making your own, the time involved certainly doesn't quite end up in your favor. However, being able to control what goes into your bread probably is worth a little extra time. Also, everyone that's picked up a disappointing loaf of sourdough knows that fresh hot sourdough is incomparable when it comes out of the oven.
The following will be a summary of my knowledge on the subject of sourdough and its starter as well as directions for caring for your own. I'll make the note here that I've probably made about 15 loaves at this point and I've finally gotten it down to a way I actually want to eat it for the last three. That's a grand summary of 12 different ways NOT to make sourdough I now know. It's a fair bit of failure I'm preventing you from there.
Sourdough Starter
There's two ways to get sourdough starter. First off, the historic way, is to have someone with starter give you some. It's important to realize that this isn't like asking for anything of value from a neighbor. They really aren't losing anything other than half a cup of flour and warm water that the might have to throw away anyway. So if you know someone who has a starter, ask. They may even have a blog post that tells you what to do with it once you have it. The second way is to get a dry starter. These can be purchased but the ones found in organic food stores really aren't that great and they don't actually sell them in normal supermarkets. The best place to get one of these is from Carl's Friends. If you send them a self addressed and stamped envelope then they'll send you some starter in a little plastic bag.
There actually is a third way to get a sourdough starter which includes setting out some water and flour mix and letting it go sour (much like milk goes sour). Then propagating it from there. This is a manner of capturing wild yeast and much like lambic brewing it is best left to people who know what they're doing.
What is Starter?
What you've got there is yeast. Whether dry or wet, the mix is probably somewhat similar. Yeast and flour in some various quantity in a little jar or powder. You know what flour is. Yeast is a living microorgamism that eats sugar and poops alcohol and CO2. The CO2 is what is important for baking, the alcohol is what is important for brewing. Because it is alive a yeast starter needs to be fed, kept warm, and safe. You can sing to it a little too if you want.
A starter needs two things to continue to propagate. First is carbohydrates which is usually added in the form of flour. The second is water, generally warm water is best (from the hot tap in your sink). This is kept at a moderate temperature ideally between 90 and 100 degrees. The yeast will multiply and you'll have more starter than you started with, some of which is used for baking. The rest is used to make more starter.
Caring for your Starter
Where I live 90 degrees isn''t an easy thing to find occurring in nature. If we're unlucky we'll get about a week of heat above 90 degrees in summer, if we're lucky it'll only be a day or two. This means we need an artificially location that we can keep the starter. Years of knowledge have shown us that if you turn on your oven light and close the door, its temperature will range between 85 and 100 degrees. This makes your oven the perfect place for storing starter as well as raising bread. I had never understood the purpose of that little light until now.
I don't feed my starter every day, but generally every other day. I also feed it the two days before I actually make bread. I feed it equal parts flour and warm water. If I'm just keeping it along, I'll only throw in about 1/3 or 1/2 cup of each. If I'm trying to grow it big I'll do up to 1 cup of each. I generally use bread flour which I store in a gallon container as I go through a large amount of it making my own bread. If I feel that my starter doesn't have enough sour kick I'll do 1/2 cup rye flour and warm water to boost the sour flavor.
(One note on flour, apparently bread flour is different from regular flour, so use bread flour for bread. Also don't use whole wheat bread flour. You can mix a little of it in with the white flour in about a 1 to 2 ratio but full whole wheat sourdough doesn't really work well. The nutty flavor of whole wheat doesn't really mesh well with the sour flavor and you end up with something that is mediocre instead of light and fluffy.)
You can see how it is pretty easy to end up with massive amounts of starter relatively quickly. If you're adding 2 cups of total material to it each day, It'll continue to grow unless you make bread every day. Another option is to refrigerate your starter after it gets going strong. I used a baby food jar and stuck it in the fridge. When I came back a few weeks later and got it going again it still worked great. It took a few days to build up mass to a decent size but I was back to making more sourdough quickly. When it's cool the yeast goes inert and falls asleep. I've heard that if you're only making bread once a week you can keep your starter on the counter and the yeast will still work but at a much slower pace requiring less often feeding. I haven't done this yet but it seems it could be a good way to moderate the amount of starter you end up with.
Making Bread
The actual process of making bread is full of imperfection, lack of clarity, and issues. I haven't figured out how to make loaves rise up rather than out when they're not in a bread pan so I haven't made effective sourdough bread bowls yet. So this is what I'm doing right now that makes good, basic, bread shaped bread for everyday use.
In the mixer with a dough hook mix for (10-15 minutes):
3 cups white bread flour
2 tsp sugar
2 tsp salt
1 cup sourdough starter
1 cup warm water
1 tsp (1/2 packet) dry yeast (not instant)
Sometimes this comes out perfect, sometimes it needs more water, sometimes it needs more flour. Using my Kitchenaid mixer you want the dough to mostly attach to the hook but still be sticking to the very bottom of the bowl at the same time.
Then spray a large glass bowl with cooking spray and put the dough into the bowl. You may find it easier to detach the hook, flour your hands, and spray them with cooking spray. This stuff should be super sticky at this point. It will stick to anything. Spray the top of the dough with cooking spray and cover with plastic wrap.
There's no reason you can't just use flour instead of cooking spray if you want to be more traditional.
Let it rise in the oven for about one and a half hours. It should be much bigger at this point.
Take the dough out and knead on a floured surface for 5 minutes.
Spray your bread pan with cooking spray and place the dough in it. This is the time to place cuts into the top of the bread to suit your design preferences. Then spray the top of the bread and cover with the same piece of plastic wrap you used for the bowl. Stick back in the oven for one to two hours. How long you let it sit depends on how fluffy you want your. The longer time it sits, the more CO2 is released by the yeast making bigger bubbles in the bread. One hour will make a fairly dense and hefty bread while three hours might escape your pan and be very light and fluffy when cooked. I'd advise somewhere between one and a half and two hours.
When it reaches the size you want it (it won't really rise much when cooked) take it out and turn on the oven to 425. Take the plastic wrap off and cook for 20 minutes, then turn down to 400 for 20 minutes. Then take it out of the oven and remove from bread pan to cooling rack. It is ready to eat and should be tasty.
Yesterday's looked like this:
A few important side notes.
1) Don't put a tightened lid on your starter in the oven. That release of CO2 is making carbonation which equals pressure. It could cause your jar to explode if you're unlucky, or spray all over the place if you're lucky.
2) Take out your yeast starter before you turn the oven on for cooking anything. This includes bread or a roast, or anything that you turn on the oven for. I've melted plastic lids into my starter which ruins the starter, and the lid.
3) Spray or flour the top of the dough, no really. When you look at your nicely proofed batch of sourdough that has achieved a glorious shape you're finally proud of it is very sad to pull off the plastic wrap and find that the top 1/4 inch of dough comes with it.
4) After you make a batch, refeed your starter. Don't empty it all the way to make a batch of bread. You want it to keep growing.
5) Don't worry about the hooch, just don't drink it. Hooch is the layer of alcohol that forms on top of your starter as a byproduct of yeast reproduction. Don't throw it out for sourdough. It contains a fair amount of the sour flavor. Just stir it back in. Also, don't be a hoochy mama and drink it to get drunk. There are thousands of way to become intoxicated, this one is probably the worst.
6) Take your bread out of the bread pan when it's done. If you leave it in there it'll get damp and won't last as long. Let it cool on a rack.
Having recently graduated from Evergreen State College with a Masters in Teaching. I've now started a teaching position on Bainbridge Island and have moved to Suquamish. This blog stands to document my experiences with food and cooking in the North Kitsap area.
Showing posts with label Food. Show all posts
Tuesday, August 9, 2011
Directions to Start a Sourdough Starter now that I've Started Mine
Wednesday, July 27, 2011
Is there such a thing as a wheat bush?
This one goes out to all my Manitou Park Elementary friends who introduced me to the wonderful world that is wheatberries. Take that pasta salad!
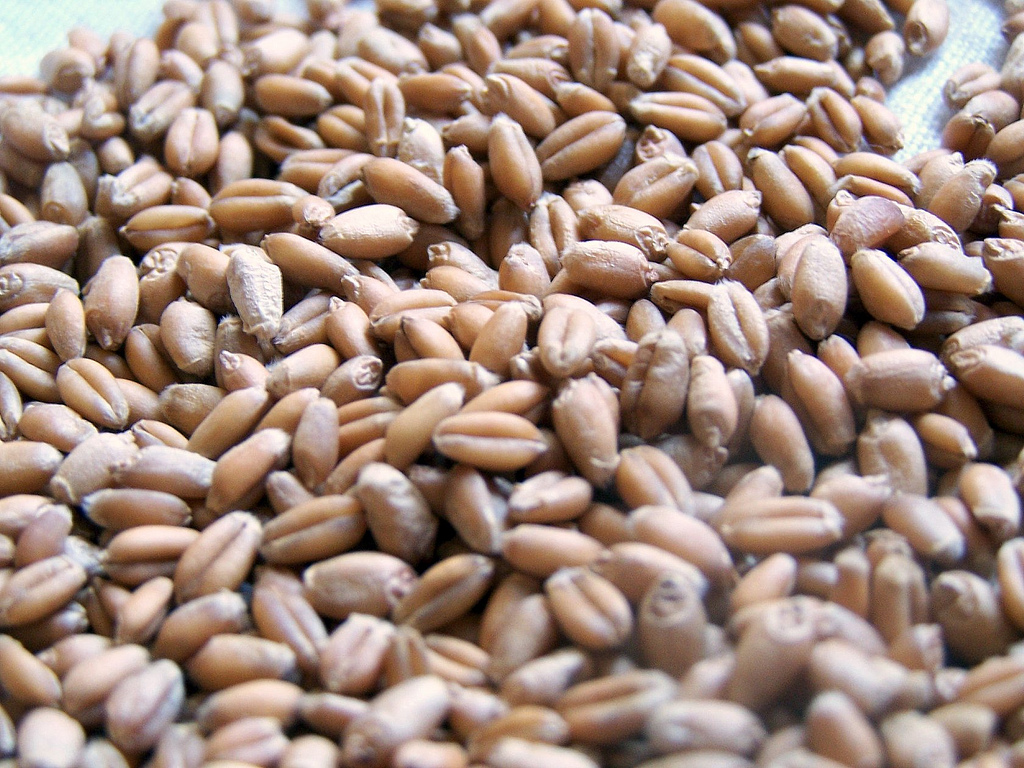
According to wikipedia, "wheatberry or wheat berry refers to the entire wheat kernel (except for the hull), comprising the bran, germ, and endosperm. Wheatberries have a tan to reddish brown color and are available as either a hard or soft processed grain." They come dried heavily resembling barley and would probably fulfill a similar role in soups by adding some density and carbs in little pockets. However, it is also very useful as a substitute for small pasta like orzo. Being that it consists of a whole grain rather than just the high carb flour used for pasta it provides a far more healthy alternative as well.
Cooking with these little berries requires a fair amount of preparation as they need to be soaked overnight before use. I've seen some recipes that call for only soaking for an hour or so. I'm not sure how they'd turn out. But filling a pot with water the day before you want to cook at batch and pouring them in really isn't too hard. Once they've been soaked all you have to do is rinse them off then boil them for an hour or so and rinse again.
Here comes the big secret through. According to my elementary teacher contacts you can freeze them in premeasured bags at this point with no ill effects. This means that you can soak and cook a big batch all at once and then freeze them in ziplock bags for later use. All that work only needs to be done once.
Once they're done they can be used to make a pasta salad, side dish, thrown into soups, or whatever else you desire. The best thing about them is that they really don't require heavy seasoning like pasta. The gummyness of pasta usually requires you to add oil to keep it from sticking together and some fairly heavy seasonings and salt to make taste good. The wheatberries already have their own rich, buttery flavor meaning they don't require anything additional.
Wheatberry Greek Salad
1 cup (unprepared) wheatberries (3-4 cups prepared)
1/2 cucumber (peeled)
1 small tomato
20 pitted Katamala olives
2 oz crumbled feta cheese
1/4 tsp salt
Black pepper
Prepare wheatberries by soaking over night, rinsing, boiling for 1 hour, then rinsing again with cold water and draining.
Dice 1/2 cucumber with seeds removed, set aside in a bowl and cover with the salt. Let sit for 5 minutes.
Dice Tomatoe and Katamala olives.
Stir together diced wheatberries, diced cucumber, diced tomato, diced olives, and feta together. Crack fresh pepper over the mix.
Again one important thing to notice is the lack of heavy seasoning or oil to make a great pasta salad. Just veggie elements. The salt is optional and I only use it because I ended up with a pretty bitter cucumber. If yours are good and fresh you won't need it. There's tons of other stuff you could add to the salad, from broccoli, roast veggies, onion, peppers, to sausage, ham, chicken, or bacon.
Saturday, July 23, 2011
A New Look at Carrots
Recently we've been looking at carrots. In particular because we saw some seeds for amazing purple carrots. They were a deep beet purple on the outside but were a pretty normal orange on the inside. Apparently wild carrots are purple and they all used to look like that until they were bred to be orange. Personally, I'm liking what the purple does to my salad.
Now the other thing that I threw into my salad here is the carrot greens. They have a light carrot/parsley flavor and only when you get down to the big thick stems do you tend to find heavy off flavors. They were really good in my salad and brought in a bold flavor to the greens. This made me start to think, how can you use carrot greens productively. You get about double the leafy green compared with the meat of the carrot. It's a bummer to just throw them away.
(On a side note there is some question as to the poisonous nature of carrot greens. It is a very powerful allergen to those allergic to yarrow and chamomile. Considering that I'm fond of chamomile tea, I'm probably safe. For more info check the Carrot Museum. Then explain to me who decided to set up a museum of carrots.)
One big use discussed is in broth or stock. I can imagine that these greens bring great flavor to soups or stocks because the combination of carrot/parsley flavor could really boost an otherwise bland chicken or veggie stock. It's also an easy use as they just get tossed into a pot and boiled. But for me, today, this isn't a crazy enough idea. I need to go bigger. Therefore, I give you sauteed carrot tops with garlic and fennel.
Sauteed Carrot Tops with Garlic and Fennel (serves 4)
1 tbsp olive oil
3 cloves of garlic sliced thin or pressed
1 tsp fennel seeds
Carrot tops from one bunch of carrots (tear off the leaves from the stem and cut into 3-5 inch pieces)
Salt and Pepper
1 pinch red pepper flakes
2 tsp wine vinegar
2 tbsp water
1 tbsp butter
Tear off leaves from the stems of the carrots and rinse well. The stems have a very strong flavor making them fantastic for stock but overpowering when eating straight. Keep the carrots for later use or throw them in with the leaves and cook them all together.
Heat olive oil in a frying pan that you have a lid for over medium low heat (consider the amount of leaves and the amount of space in the pan).
Once it heats up press in the garlic and toss in the fennel.
Stir for about 3 minutes until the garlic begins to brown lightly.
Dump carrot tops into the pan and stir to coat them with the oil and to get the garlic off the bottom of the pan. Sprinkle with salt, pepper and pepper flakes and stir every 30 seconds for 2-3 minutes.
Pour wine vinegar onto the mixture along with a couple of tablespoons of water. Stir again and cover for 5 minutes. After 5 minutes stir again and cover.
Take off lid and turn off heat. Then throw your tab of butter on top and stir it in.
Mine ended up like this when served with steak and potato:
Now the other thing that I threw into my salad here is the carrot greens. They have a light carrot/parsley flavor and only when you get down to the big thick stems do you tend to find heavy off flavors. They were really good in my salad and brought in a bold flavor to the greens. This made me start to think, how can you use carrot greens productively. You get about double the leafy green compared with the meat of the carrot. It's a bummer to just throw them away.
(On a side note there is some question as to the poisonous nature of carrot greens. It is a very powerful allergen to those allergic to yarrow and chamomile. Considering that I'm fond of chamomile tea, I'm probably safe. For more info check the Carrot Museum. Then explain to me who decided to set up a museum of carrots.)
One big use discussed is in broth or stock. I can imagine that these greens bring great flavor to soups or stocks because the combination of carrot/parsley flavor could really boost an otherwise bland chicken or veggie stock. It's also an easy use as they just get tossed into a pot and boiled. But for me, today, this isn't a crazy enough idea. I need to go bigger. Therefore, I give you sauteed carrot tops with garlic and fennel.
Sauteed Carrot Tops with Garlic and Fennel (serves 4)
1 tbsp olive oil
3 cloves of garlic sliced thin or pressed
1 tsp fennel seeds
Carrot tops from one bunch of carrots (tear off the leaves from the stem and cut into 3-5 inch pieces)
Salt and Pepper
1 pinch red pepper flakes
2 tsp wine vinegar
2 tbsp water
1 tbsp butter
Tear off leaves from the stems of the carrots and rinse well. The stems have a very strong flavor making them fantastic for stock but overpowering when eating straight. Keep the carrots for later use or throw them in with the leaves and cook them all together.
Heat olive oil in a frying pan that you have a lid for over medium low heat (consider the amount of leaves and the amount of space in the pan).
Once it heats up press in the garlic and toss in the fennel.
Stir for about 3 minutes until the garlic begins to brown lightly.
Dump carrot tops into the pan and stir to coat them with the oil and to get the garlic off the bottom of the pan. Sprinkle with salt, pepper and pepper flakes and stir every 30 seconds for 2-3 minutes.
Pour wine vinegar onto the mixture along with a couple of tablespoons of water. Stir again and cover for 5 minutes. After 5 minutes stir again and cover.
Take off lid and turn off heat. Then throw your tab of butter on top and stir it in.
Mine ended up like this when served with steak and potato:
The stems are to the left, they were too potent to eat.
Monday, July 11, 2011
Three great meals, part 3
The final piece of this project was actually go be enjoyed with a couple of friends that came over with their kid. It also, however, meant that I didn't have enough meat for everyone and I had to augment with some tri-tip. I suppose it would make a good comparison. I can generally buy tri-tip at $2.79 per pound at the cash and carry down the street. The only problem is that I need to get 16+ pounds at a time. It's 5 big tri-tips. My family can really only eat half a tri-tip if we're serious about it.
But either way the tacos consisted of corn tortillas, salsa, cheese, avocado, and romaine lettuce. Good salsa is essential for such things. My store purchase choice would be Emerald Valley in your favored level of heat. But I have some small shop salsa from Manuel's in Aptos, ca. (Wow. They've got a nice webpage. Never had to look it up because we've had the menu memorized for the past 22 years.) Besides going through about a pint of salsa when we're there as a family they sell it for $5 a jar. It sound like a lot for salsa but it's pretty hot salsa and a jar will last you for a bit, even with 4 people digging into it.
My tacos came out pretty good. These only have the Bottom Round:
But either way the tacos consisted of corn tortillas, salsa, cheese, avocado, and romaine lettuce. Good salsa is essential for such things. My store purchase choice would be Emerald Valley in your favored level of heat. But I have some small shop salsa from Manuel's in Aptos, ca. (Wow. They've got a nice webpage. Never had to look it up because we've had the menu memorized for the past 22 years.) Besides going through about a pint of salsa when we're there as a family they sell it for $5 a jar. It sound like a lot for salsa but it's pretty hot salsa and a jar will last you for a bit, even with 4 people digging into it.
My tacos came out pretty good. These only have the Bottom Round:
Also enjoyed with it was some homemade Cascade Pale Ale. Good stuff.
Comparatively the tri-tip was still more tender but significantly less flavorful. The ability to get on all sides of the thin strips of meat helped the marinade penetrate the meat of the bottom round. This cheap meat had a good smoky salsa flavor and was easy to bite through without dragging half your taco out of the shell on each bit. Overall great success.
As I'm reading about how butchers use meat I see a disproportionate amount of highly usable meat like this being ground up with large quantities of fat to make ground beef. However, this meat is highly usable in its low fat and natural cut. Don't fear the cheap meat. It can all be used well.
Saturday, July 9, 2011
Three great meals, part 2
Kebabs
Now I love a good piece of meat. But that's really not what I'm starting with here. It's bad tough meat. BBQing it in big chunks is the ultimate challenge for it. Short of grilling it as an actual steak, which I know won't work very well. And shish kebabs are generally better with decent sized chunks of meat rather than little tiny squares that get all over cooked.
Additionally we brought these kebabs over to a friend's BBQ so controls over the cooking was somewhat limited. It would be a true test of how well the meat would break down.
When I went to make them I found my standby jars of pineapple chunks missing. Unfortunately I forgot to stock them. Fresh pineapple would have been even better but those tend to range from really expensive to just plain silly around here. And I wasn't going with the canned beats route on this particular batch. But in generally some grilled canned beats on the skewers are fantastic. I ended up with mushrooms, onion, red bell pepper and Indian eggplant. These ranged in size from quail to robin egg size as I had used the larger ones in the stir fry last night. In the end things looked like this:
Now I love a good piece of meat. But that's really not what I'm starting with here. It's bad tough meat. BBQing it in big chunks is the ultimate challenge for it. Short of grilling it as an actual steak, which I know won't work very well. And shish kebabs are generally better with decent sized chunks of meat rather than little tiny squares that get all over cooked.
Additionally we brought these kebabs over to a friend's BBQ so controls over the cooking was somewhat limited. It would be a true test of how well the meat would break down.
When I went to make them I found my standby jars of pineapple chunks missing. Unfortunately I forgot to stock them. Fresh pineapple would have been even better but those tend to range from really expensive to just plain silly around here. And I wasn't going with the canned beats route on this particular batch. But in generally some grilled canned beats on the skewers are fantastic. I ended up with mushrooms, onion, red bell pepper and Indian eggplant. These ranged in size from quail to robin egg size as I had used the larger ones in the stir fry last night. In the end things looked like this:
Please ignore the burgers, they weren't mine. I don't do that.
The verdict on the meat was that most pieces of were very good. I ran into two pieces that were somewhat difficult to tear apart with my teeth. It was full of flavor and for the most part well tenderized. We ended up having to eat it without a knife so the pieces I struggled with would have been much better if they could have been cut in half. The eggplant turned out great, the small size meant that moisture was kept inside and each one was full of fresh eggplant flavor. I think these could have used to be marinated as well and I plan to try that in the future. But even as they were they turned out fantastic.
Thursday, July 7, 2011
Three great meals, part 1
The Stir Fry
So having had rib eye for dinner last night, just rib eye, we felt a need for penance in the form of a hoard of veggies. So stir fry it is. I started soaking the rice, I've found that it actually is important to follow instructions when cooking rice. Soaking brown rice really helps break apart the tough husk and create a fluffy rice that is more similar to expectations we face from a white rice world. So we soak the rice before cooking it with some salt and butter.
Once the rice has about 25 minutes to go you can start cooking everything else. It does help to have it already cut up at this point. The stir fry this time was to include ginger, eggplant, carrots, onions, bok choy, green onions, and red bell pepper.
So having had rib eye for dinner last night, just rib eye, we felt a need for penance in the form of a hoard of veggies. So stir fry it is. I started soaking the rice, I've found that it actually is important to follow instructions when cooking rice. Soaking brown rice really helps break apart the tough husk and create a fluffy rice that is more similar to expectations we face from a white rice world. So we soak the rice before cooking it with some salt and butter.
Once the rice has about 25 minutes to go you can start cooking everything else. It does help to have it already cut up at this point. The stir fry this time was to include ginger, eggplant, carrots, onions, bok choy, green onions, and red bell pepper.
Sesame Mint Stirfry Marinade
1 lb bottom round thinly sliced into strips
2 TBSP Sesame Oil
1 TBSP Sesame Seeds
3 Cloves of garlic (or more)
Juice of 1 lime
1 diced green onion
6-10 mint leaves
Garlic salt and pepper to taste
Stirfry
2 tsp sesame oil
1 tbsp minced ginger
Fry in wok for about 5 min
1 lb marinated meat
Fry until sufficiently cooked then remove to a bowl on the side
2 carrots sliced thin
1/2 onion
Cook until the onions begin to soften (3-5 minutes)
3 baby bok choy chopped into 1 inch pieces
2 green onions split and chopped into 2 inch strips
10 Indian eggplant sliced thin, or Chinese eggplant, or whatever
2 tbsp soy sauce
a sprinkle of fish sauce
2 tbsp brown sugar
2 tbsp red wine vinegar
1 tbsp sesame oil
Cook until the bok choy begins to fade (5-8 minutes)
1 red bell pepper in long thin slices
10 basil leaves
10 basil leaves
return the meat to the wok and stir all together on high heat for 1 minute
Sprinkle with sesame seeds
What I got looks like this:
Flavor analysis:
The mint really wasn't worth it. It didn't lend much flavor, basil leaves would have been better in the marinade. However, the cheap meat could have been flank steak for how tender it was. Total success on breaking down the tough meat into something that was full of flavor and easy to chew. The sesame oil penetrated the meat well and gave it a good solid flavor. I'm still thinking of more ways to increase the sesame flavor beyond dumping more expensive sesame oil on top. All in all a good solid stir fry was enjoyed by all.
Wednesday, July 6, 2011
One crappy piece of meat, three great meals
Heading to the store for this weeks shopping after returning from California facing a severely empty fridge, barren except for some several month old egg yokes, moldy spaghetti sauce, and expired milk and yogurt, I found an interesting dilemma. It seems that fourth of July sales had left me with $4.99 rib-eyes, a package of which was acquired, and few other cheap options for non-steak meats. The regular selection of carne asada meats was limited to think cut eye of round at far more than I wanted to pay for taco meat and the cheap meat for sale was ball-tip or petite sirloin steaks, which considering their $3.99/lb price tag was hardly worth a glance.
However, I was not without luck as I saw $2.26/lb bottom round roasts. Now I know that when you hear the term bottom round roast your mind conjures up images of tough gristly meat that takes hours to cook in the oven to be tolerable, not what you'd want on a hot summer day. But I was undeterred by the challenge of making something out of a seven dollar bottom round. In fact, I figured that I could make three very diverse meals for my family with this unremarkable meat that would reach far past its common potential.
Day 1 Cutting and Marinade
Considering that this is a tough piece of meat that has virtually no marbling for flavor or softening, I knew that I had to do something to soften it up. Cooking it for the usual 3-4 hours in the oven would prove a killer on a 80 degree summer day, marinading was the only tolerable option. But first, I had to slice it. I knew that to make the next week not feel like the week after Thanksgiving where you're forced to find another use for the same ole turkey, I was going to need to start with variety. One thing about the bottom round is that there is a tough layer of fat along the bottom of the roast. This fat can be useful in shish kabob meat if it's tenderized through some good marination. I also know that this meat cut small and thin can provide good solid stirfry meat, cutting thin is important here. And finally I wanted some of my missing carne asada, possibly because I had some salsa from my hometown Mexican restaurant that came home with me as a birthday present, probably because I still had a jar of it from Christmas that I hadn't managed to use yet.
So I started at the end making full slices which included the fat at the bottom. This would be my carne asada. I kept them somewhere between one quarter and one half inch thick. Occasionally I failed to cut well and ended up with a weird chunk that would surely fall through the cracks on my barbeque. I set this aside for use later. Once I had about 8 decent slices I cut about an inch to inch and a half above the fat through the rest of the roast. The bottom with the fat I cut into one inch squares being sure to include the piece of fat on each square. The rest I sliced first into quarter inch thick pieces, then cut as appropriate to make about three quarter inch strips. In the end I had one piece of meat, cut three very diverse ways like this:
However, I was not without luck as I saw $2.26/lb bottom round roasts. Now I know that when you hear the term bottom round roast your mind conjures up images of tough gristly meat that takes hours to cook in the oven to be tolerable, not what you'd want on a hot summer day. But I was undeterred by the challenge of making something out of a seven dollar bottom round. In fact, I figured that I could make three very diverse meals for my family with this unremarkable meat that would reach far past its common potential.
Day 1 Cutting and Marinade
Considering that this is a tough piece of meat that has virtually no marbling for flavor or softening, I knew that I had to do something to soften it up. Cooking it for the usual 3-4 hours in the oven would prove a killer on a 80 degree summer day, marinading was the only tolerable option. But first, I had to slice it. I knew that to make the next week not feel like the week after Thanksgiving where you're forced to find another use for the same ole turkey, I was going to need to start with variety. One thing about the bottom round is that there is a tough layer of fat along the bottom of the roast. This fat can be useful in shish kabob meat if it's tenderized through some good marination. I also know that this meat cut small and thin can provide good solid stirfry meat, cutting thin is important here. And finally I wanted some of my missing carne asada, possibly because I had some salsa from my hometown Mexican restaurant that came home with me as a birthday present, probably because I still had a jar of it from Christmas that I hadn't managed to use yet.
So I started at the end making full slices which included the fat at the bottom. This would be my carne asada. I kept them somewhere between one quarter and one half inch thick. Occasionally I failed to cut well and ended up with a weird chunk that would surely fall through the cracks on my barbeque. I set this aside for use later. Once I had about 8 decent slices I cut about an inch to inch and a half above the fat through the rest of the roast. The bottom with the fat I cut into one inch squares being sure to include the piece of fat on each square. The rest I sliced first into quarter inch thick pieces, then cut as appropriate to make about three quarter inch strips. In the end I had one piece of meat, cut three very diverse ways like this:
Upper right carne asada, bottom right shish kebab, left stir fry
With the meat appropriately cut up it was time to move on to the marinades. I started with three quart size ziplock bags and put each kind of meat in one. Then I pulled out a can of chipotle peppers in adobo sauce and added some salt, pepper, and lime juice. However, I was severely short of liquid for the marinade so I grabbed a bottle of my old (from college) tequila and used that to loosen up the sauce.
Chipotle Carne Asada Marinade
1 lb carne asada meat
half of a 7 oz can (3 oz) chipotle peppers in adobo sauce
juice of 1 lime (go ahead and throw in the rest of the lime when you're done squeezing it.
1/4 cup cheap tequila
Garlic salt and pepper to taste
With the shish kebabs I really wasn't going for anything too original. Soy sauce, rice vinegar, brown sugar, garlic, garlic salt, pepper, and some red wine.
Teriyaki Shish Kebabs Marinade
1 lb bottom round cut into 1 oz cubes with the fat still on
1/4 cup soy sauce
2 TBSP rice vinegar
1/4 cup brown sugar
2 cloves of garlic (or more)
1/4 cup red wine
Garlic salt and pepper to taste
For the stir fry meat I wanted to avoid doing the exact same thing I just did with the shish kebab meat so the first thing I decided to vacate was soy sauce and rice vinegar. So I started with an oil, sesame oil to be exact. This stuff is super flavorful and is used as a dipping sauce in Korean restaurants. But I wasn't going to stop there. I added some sesame seeds, another lime, salt and pepper, garlic, and for a final touch I put in some green onions (another stir fry marinade we did had this) and a half dozen mint leaves. It smells flavorful, no clue how it'll taste.
Sesame Mint Stirfry Marinade
1 lb bottom round thinly sliced into strips
2 TBSP Sesame Oil
1 TBSP Sesame Seeds
3 Cloves of garlic (or more)
Juice of 1 lime
1 diced green onion
6-10 mint leaves
Garlic salt and pepper to taste
All of these wonderful marinades get to sit until I decide to cook them up and eat them starting tomorrow. I'll put through pictures of each meal and report on how the final cooking went.
Subscribe to:
Posts (Atom)